Install Apache2 webserver:
aptitude install apache2
Install required libraries:
aptitude install libstdc++5
Install coldfusion:
Download the coldfusion installation paket (Linux bin-file) from www.adobe.com. You can use the Trial Edition and upgrade later to the full version by enter the serial number in the administration webinterface
Make the downloaded file executeable and run the installer:
chmod +x ColdFusion_9_WWE_linux64.bin
./ColdFusion_9_WWE_linux64.bin
Answer the following questions:
PRESS  TO CONTINUE:
DO YOU ACCEPT THE TERMS OF THIS LICENSE AGREEMENT? (Y/N): Y
Install Type
------------

If you do not have a serial number, select either 30-day trial or Developer
Edition.

  ->1- Install new version of Adobe ColdFusion 9 with a serial number
    2- 30-day trial
    3- Developer Edition

Installation Choice: 2
Installer Configuration
-----------------------

What kind of installation do you want?

  ->1- Server configuration
    2- Enterprise Multiserver configuration
    3- J2EE configuration (EAR file)
    4- J2EE configuration (WAR file)

Choose one of the following options:: 1
Is Adobe ColdFusion 9 (Server Configuration) Installed?
-------------------------------------------------------

You cannot install the server configuration of Adobe ColdFusion 9 if it is already installed on this computer.

Is there already a server configuration of Adobe ColdFusion 9 installed?

    1- Yes
  ->2- No

ENTER THE NUMBER FOR YOUR CHOICE, OR PRESS  TO ACCEPT THE DEFAULT:: 2
Subcomponent installation
-------------------------

The following options are available for installation.

An option marked with "[X]" in front will be installed and an option with "[ ]"
will not.  Choosing an option will toggle it on or off

[X] 1) ColdFusion 9 Documentation
[X] 2) ColdFusion 9 Solr Services
[X] 3) ColdFusion 9 Search Services
[X] 4) Start ColdFusion on system init

    5) Continue with installation

Select an option: 5
Choose Install Folder
---------------------

Select the directory where you want to install Adobe ColdFusion 9.

Directory:

  Default Install Folder: /opt/coldfusion9

ENTER AN ABSOLUTE PATH, OR PRESS  TO ACCEPT THE DEFAULT
      : /opt/coldfusion

INSTALL FOLDER IS: /opt/coldfusion
   IS THIS CORRECT? (Y/N): Y
Earlier Versions of Adobe ColdFusion installed?
-----------------------------------------------

If you installed an earlier version of ColdFusion on this computer, you can migrate your settings to Adobe ColdFusion 9.

Is there an earlier version of ColdFusion installed on this computer (for example, ColdFusion 6 or ColdFusion MX 7)?

    1- Yes
  ->2- No

ENTER THE NUMBER FOR YOUR CHOICE, OR PRESS  TO ACCEPT THE DEFAULT:: 2
Configure Web Servers
---------------------

Please configure your web server(s).  If you do not configure a web server the
built-in web server will be used on port 8500 or the next available port.

    1- Add Web Server Configuration
  ->2- Continue with installation

Choice: 1

****************************************************

  ->1- Apache
    2- Sun ONE Web Server (iPlanet)
    3- Cancel

What kind of web server are you configuring: 1

What directory contains your Apache configuration file (httpd.conf)? (For
   example, on Red Hat Linux it could be located in the /etc/httpd/conf
   directory if you installed from an rpm, or for SuSe Linux, it could be in
   /etc/apache2)

   Directory: /etc/apache2

****************************************************

Where is the Apache program binary file? (For example, on Red Hat Linux it
   could be /usr/sbin/httpd if you installed from an rpm, or for SuSE Linux it
   could be located at /usr/sbin/httpd2) If you have more than one instance of
   Apache on your computer, enter the binary file location for the Apache web
   server that will use ColdFusion. (Note: this is not the Apache start and
   stop script.)

   File: /usr/sbin/apache2

****************************************************

Where is the control file that you use to start and stop the Apache web
   server? (For example, this could be /etc/init.d/httpd on Red Hat Linux if
   you installed from an rpm, /usr/sbin/apache2ctl on SuSe Linux, or it could
   be /usr/local/apache/bin/apachectl on hand-compiled versions.)

   File: /etc/init.d/apache2

****************************************************

Please configure your web server(s).  If you do not configure a web server the
built-in web server will be used on port 8500 or the next available port.

    1- Add Web Server Configuration
    2- Remove Web Server Configuration
    3- Edit:Apache : /etc/apache2
  ->4- Continue with installation

Choice: 4
Choose Adobe ColdFusion 9 Administrator Location
------------------------------------------------

Select the location of the web root for Adobe ColdFusion 9. This is where the installer places the Adobe ColdFusion 9 Administrator.

This directory must be the web root for one of the websites to be configured for use with Adobe ColdFusion 9.

Directory: (DEFAULT: /etc/htdocs): /var/www
Runtime User
------------

Enter the name of the runtime user.   This user must already exist on the system.

User Name: (DEFAULT: nobody):
Configure ColdFusion with OpenOffice
------------------------------------

Configuring OpenOffice installation with ColdFusion will enable Office documents to be processing using OpenOffice. If OpenOffice is not configured ColdFusion will not be able to convert some Microsoft Office Documents to PDF. Check the documentation for more details.

    1- Configure ColdFusion with local Openoffice installation
  ->2- Skip

ENTER THE NUMBER FOR YOUR CHOICE, OR PRESS  TO ACCEPT THE DEFAULT:: 2
Administrator Password
----------------------

Enter the password that you will use to restrict access to the ColdFusion
Administrator.

This field is required.

Password:
Confirm Password:
Enable RDS
----------

The ColdFusion Remote Development Service (RDS) lets developers using Adobe
tools remotely connect to this server for development purposes. RDS is required
for Line Debugging, Report Builder, and Dreamweaver Extensions.

If this is a production server, Adobe recommends that you disable RDS.
Note, however, that disabling RDS also disables debugging, the directory
browsing applets in the ColdFusion Administrator and some of the functionality
in the Report Builder.

Enable RDS  (Y/N): Y
Password:
Confirm Password:
Installation Confirmation
-------------------------

Installation Type:
  Server configuration

Licensing:
  30-day trial

Installation Directories:
  Product: /opt/coldfusion
  Web root: /var/www

Server Information:
  Web Server: Apache (/etc/apache2)
  Port:
  Search Services: installed
  ColdFusion Solr Search Services: installed
  Documentation: installed
  RDS: enabled

Disk Space Information (for Installation Target):
  Required: 992,437,542 bytes
  Available: 4,799,873,024 bytes

PRESS  TO CONTINUE:
Installing...
-------------

 [==================|==================|==================|==================]
 [------------------|------------------|------------------|------------------]

===============================================================================
Installation Complete
---------------------

You have successfully completed the first step in installing Adobe ColdFusion
9.

To continue with your installation, go to /opt/coldfusion/bin and type
"./coldfusion start" to start your server.

Once the server, is started log in to the Configuration Wizard at
http://[machinename]/CFIDE/administrator/index.cfm

Press Enter to exit the installer:
Start coldfusion:
/opt/coldfusion/bin/coldfusion start
Coldfusion now install the connector for the Apache2 webserver (/etc/apache2/httpd.conf). This connector forwards the scripts to the coldfusion server.
Start coldfusion on system start:
cp /opt/coldfusion/bin/coldfusion /etc/init.d
update-rc.d coldfusion defaults
Finish installation:
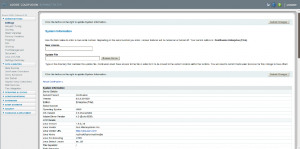
To finish the installation, open the coldfusion administrator with your browser.
http://SERVERNAME/CFIDE/administrator/index.cfm

Note:
You can use this howto to install Adobe Coldfusion 8, too. All installation steps are the same.

Student Loan
6 Aug. 2010Very impressive topic you have tons of information to offer on this matter. Its always a positive sign to see when you post
gold
2 Sep. 2010a nice article
Uwe Degenhardt
18 Dez. 2010Ein kleiner Hinweis: müsste es nicht heissen: /opt/coldfusion9/bin/coldfusion9
Das wird ja standardmässig so vorgeschlagen und bei mir auch so installiert. Wenn die „9“ weggelassen wird, dann wird das Verz. nicht gefunden. Ansonsten ist das Tutorial sehr gut. Danke. LG Uwe
Uwe Degenhardt
18 Dez. 2010Ich meinte natürlich: /opt/coldfusion9/bin/coldfusion
sebastian
20 Dez. 2010Hallo Uwe,
ja „/opt/coldfusion9“ wird vorgeschlagen. Ich habe dies jedoch wie in der Anleitung beschrieben zu „/opt/coldfusion“ abgeändert:
Default Install Folder: /opt/coldfusion9
ENTER AN ABSOLUTE PATH, OR PRESS TO ACCEPT THE DEFAULT
: /opt/coldfusion
Du wirst mir spätestens dann dankbar sein wenn du eine Horde von coldfusion9 Servern zu coldfusion10 upgraden musst. Dann darfst du nämlich sonst alle Pfade anpassen 🙂 Deswegen installiere ich das ganze nach „coldfuison“ und lasse die Versionsnummer immer weg.
Gruß
Sebastian
Uwe Degenhardt
20 Dez. 2010Hi Sebastian, aha. ok. Verstehe. Macht Sinn. Ich wollte auch gerade einen Upgrade von CF8 auf CF9 machen. Irgendwie hat das nicht hingehauen. Aber er meckert schon beim Serial-Key zu Anfang. Der sei nicht korrekt (invalid). Ist aber wohl ein Problem, das ich direkt bei Adobe anfragen muss.
sebastian
20 Dez. 2010Hi,
du kannst auch einfach mal die Developer oder die 30-Tage-Testversion installieren.
Wenn du den Key dann später im CF-Admin eingibst ist alles ok. Das macht keinen Unterschied ob bei der Installation oder später.
Gruß
Sebastian
Uwe Degenhardt
20 Dez. 2010Das ging nicht. Der Upgrade-Key wurde ständig verweigert. Bei Windows geht es, nicht aber bei Linux. 🙁